Wednesday 21 November 2012

Delicious Sugar Cookies

I am a big fan of the blog Sweetapolita. I adore everything Rosie bakes and I can spend hours looking at her lovely blog.

So it's no surprise that I decided to use her recipe for the perfect sugar cookies. I must admit that it felt like a huge task, because normally you just chill the dough once and off you go. In this recipe you chill the dough three times! But boy was it worth the time!

The dough is great to work with and my cookies came out so defined, I am used to cookies losing their shapes once they hit the oven.

I did half this recipe because we have so many baked goods in our freezer already and I didn't want to go overboard. I also went slightly off road with the recipe because if you check Rosie's blog you will find two delicious recipes; sugar cookie and dark chocolate sugar cookie. I wanted to try the dark chocolate one too but didn't have the right ingredients, so.........I decided to divide the dough I made and add 40gram of cocoa powder. However I will let you check out the recipe on Sweetapolita's blog.


Once you have made the dough, wrapped it up and left it in fridge for 45 minutes, you take them out and roll them out on two pieces of grease proof paper. You have to roll the dough like there is no tomorrow at first but it's worth the man power.
Once you have rolled it out you put it back into the fridge for another 15 minutes, then the fun part starts! Using your lovely cookie cutters:0)


 I bought my cutters from John Lewis and they have tiny cutters in
the shapes of star, tree and holly leaf.
The ones above are from JL too and they are a star, tree but also an angel.
I was scared that the little ones would burn but with this recipe it went pretty well. I watched my cookies most of the time and the plain ones took about 13-15 minutes. The chocolate ones took about 15-20 minutes. The dinky ones took about 5 minutes.

I love these cookies, they are just so tasty and the recipe is
perfect!
 
These are so dainty and adorable, there is a risk of eating about 20 of these
and justifying it because of the size...


 I left this package out for my boyfriend when he came home (yes, I also made a cup of tea too :0) and he was very happy.

This is without a doubt the best cookie recipe ever.

Hope you try and enjoy it as much as I did (do, still loads of cookies left). I will share some with my work colleagues though.

Ciao! x


Sunday 18 November 2012

A weekend of no baking but a visit to Squires Kitchen!

I have spent most of this weekend wrapped up under my slanket and been looked after by my lovely boyfriend. I don't know what I have caught but it has been very unpleasant and I hope I'm on the road to recovery!
Being ill and all, I decided that this weekend shall be bake free. This is very hard for me but I rather not pass on my germs via baked goods, it would be a terrible crime!

But just because I can't bake, it doesn't mean that all baking related activities are off:0)
So much to my delight my boyfriend offered to take me to a shop I have been itching to go to.....Squires Kitchen! This lovely shop is in Farnham, a cute little market town in Surrey. I wrapped up really warm and we made our way there in the morning. I asked my boyfriend to please make sure I didn't go overboard!

We arrived and the shop looked so inviting!
I was very disciplined and tried to think of things I really wanted rather than just stuffing my basket. I picked up the below and decided to stop there. There is always next time :0)

I bought rose syrup for my next batch of Ispahan macarons, a mould with different motifs (one of which is an angel), rolled icing in turquoise and beige (white chocolate flavoured), gold spray, berry powder mix, and MMP (Mexican Modelling Paste), a free transfer sheet and turquoise cupcake cases. I adore this colour so I got the rolled icing to go with the case.  I absolutely loved the shop and will definitely go back.

Squires Kitchen is an international Bakery School and I will definitely try to attend a few courses. Unfortunately majority of them are during weekdays. Do check them out though, click on the name for their website; Squires Kitchen.
After the shopping we worked up an appetite and decided to go for a Sunday roast. We came across this little lion and lamb woodcarving, I had to send the picture to my sister because she loves lions.

We ended up at a pub called Nelson's Arms in Farnham. The roast was delicious and the staff were lovely. At 12.30 majority of their tables were already reserved and we were lucky enough to grab a table in the corner for ourselves. If you ever find yourself in Farnham, I would recommend this place!

Next weekend is my boyfriend's brother's fiance's (that sentence is long!) hen do and I can't wait. We are going to Sanderson's hotel and having Afternoon Tea Mad Hatter's style. I will definitely be taking lots of pictures and eat my weight in clotted cream (well, probably not but I LOVE clotted cream so I will eat a lot of it!)

Have a great week, ciao! x

Wednesday 14 November 2012

Edible bauble cake!

I am not one for making things which are not meant for consumption, I don't like the waste and I love cake too much to make something I wouldn't eat. But I can't help watching Heston Blumenthal's Fantastical Food series on channel 4 without trying to be a bit inventive.....albeit it's nowhere near his imagination or budget!!

I bought two of Lakeland's individual hemisphere bake tins and I decided to make edible baubles..


Lakeland Individual Hemisphere Cake Pan

However since I only bought two, it had to become one bauble rather than baubles!

I used the same recipe for this as for the princess cake, it's a light cake and quick to mix up.

Preheat the oven to 150c (mine is a fan oven, so I would say 170c for non- fan)

2 eggs
1 dl caster sugar
0.5 dl plain flour
0.5 dl potatoe flour
1 tsp baking powder
red food colouring (optional, I used a combination of Wilton's red red and Christmas red)

150g ready to roll icing

Whisk the eggs and sugar until it goes pale yellow, mix in the flours and baking powder.
Add the colouring to your liking, I aimed for a deep red.
Make sure your moulds are greased and pour in the batter almost half way, it will rise quite a bit.
Bake for 15 minutes but check with a toothpick before removing them from the oven.

Once the half spheres have cooled, cut holes into the centres and add the chosen filling. I used a small handful of blueberries and about 50ml of whipped cream. Before creating the sphere with the halves, I brushed them with warmed up apricot glaze in order for the rolled icing to stick to the cake.
I rolled out the icing really thinlyand wrapped around each half. I then cut around each sphere, making ensure they were fully covered. Pretty much like you would do with a cake. Once covered, I gently put one on top of the other, creating a "bauble" or a ball and then wrapped it up with the ribbon.

I attempted this twice, I wasn't quite happy with the first one. I did not colour the mixture, as you can see on the picture below, when I made it the first time.

My first edible bauble!!

Second attempt is the below and I think it looks adorable. Due to the LARGE amount of food colouring, which went into this cute little cake, I decided that we should not eat it. Much to my boyfriend's disappointment!

I know it's only November and I am in no hurry for Christmas to be here already. I even wish that the Christmas decorations in the shops and towns/ cities would not go up just yet! Allowing us to look forward to Christmas rather than being fed up with it half way through November:0(
But when it comes to baking and cakes, there is no reason why you can't start experimenting already. After all, practise makes perfect :0)

Hope you have a great rest of the week, bring on the weekend I say!

Ciao! x


Sunday 11 November 2012

Lemon drizzle cake and Ispahan Macarons

The weekend arrived, Friday went by quickly mainly because we had a half day due to our office moving to new premises. Whoopie! I came home without getting caught up in rush hour and I also bumped into a friend of mine, Baker. How apt to have a friend whose last name is Baker when you love baking as much as I do. It's great to see a friendly face in London, people rarely talk to each other here, unfortunately.

I made dinner for my boyfriend and I but decided that when you have a drizzle of Limoncello left, three lemons that are about to go off and a basil plant that has been persevering through months of negligence, a cake had to be made.

 I came across a recipe on Holly Bell's blog and her recipe seemed straight forward.

Lemon Drizzle Cake (adapted from Holly Bell's blog)

Preheat the oven to 170C

Ingredients:
175g margarine/soft butter
175g caster sugar
3 eggs beaten
zest of 3 lemons
3 tbsp whole milk
175g self raising flour
half of a handful of basil leaves (optional)

juice of 3 lemons
50g caster sugar
3 tbsp of Limoncello

Grease and line the tin you have to hand, for a larger pan the bake time is usually less as the cake is less thick. For a smaller tin the bake time is usually longer. You’re looking for the edges of the cake to be pulling away from the sides and for a skewer to come out of the centre clean.

Cream the margarine/butter with 175g caster sugar until really light and creamy. Add the beaten egg gradually, dribble by dribble. Then add the zest and the milk. Worry not if the mixture curdles. Fold in the flour, pour into your tin, level with the back of a spoon and bake for 20 – 25 minutes until golden on the top and a skewer comes out clean from the middle.

Leave to cool slightly on a wire rack still in the tin and then make the sugar syrup by heating the juice of 3 lemons with 50g of caster sugar and Limoncello for about 2 minutes until the sugar dissolves and is just starting to bubble away. Poke lots of holes in your cake with a skewer and pour the syrup over the top, being careful not to let it all seep down the sides and drizzle the bottom of your cake only.

I mixed half a small tub of creme fraiche and vanilla paste to have with the cake, although it's so moist you don't really need to.


Today we went out for a full English, I had the vegetarian option in order to be "healthier" and it was quite nice although I am a bit partial to bacon. When we came back after watching the remembrance day service in our town. I decided to embark on yet another macaron mission. I had egg whites sitting in the fridge looking sad...Becoming macaron meringues were their destiny!

I always use the Delicious Magazine recipe, I will skip adding the recipe here as I have previously and it's a good website to go onto for recipe browsing.

I decide to use the Pierre Hermes' Ispahan macaron as inspiration, although I will not come anywhere near this level of excellence......yet, it's definitely a good goal to have.

I didn't quite stick to the recipe, I skipped the rose and lychee because I am still on the lookout for the rose syrup. I melted a G&B's delicious white chocolate bar (100g) in a bain marie and spread it on the bottom macarons. Then piped whipped cream (a small carton of 170ml double cream is sufficient) with a star nozzle. I arranged the raspberries and piped more cream in the middle and on the berries.


We pretty much inhaled the two we agreed to eat and left one for tomorrow. I don't know if I will last that long! We had them with a nice (small) cup of coffee, French style!
 
The only downside is that I used the ground almonds without processing them further to get a smooth finish. I am still hunting for a decent pack of ground almonds.


The weekend is unfortunately almost over but we can endure the week by having lots of cake baking  and eating:0)

Ciao! x

Sunday 4 November 2012

Sticky Toffee (Pudding) goodness!

Friday was showing promise for a great weekend. On my lunch hour I saw a beautiful rainbow and I couldn't wait for the weekend to start!

After spending the Saturday shopping, then having dinner in London and watching the Jersey Boys (which was great by the way!), we decided that we were going to stay in on Sunday to take it easy.

But with almost no food left after the week, we decided to attempt a short journey to Waitrose for a spot of shopping. No gloves, a summer scarf, black leggings, a sweater and a thin jacket....cycling has never been a worse idea. We got back slightly frozen but a nice cup of tea warmed us up.

I fancied making something this weekend which had warmth and a slightly different flavour than vanilla or chocolate. I decided to make sticky toffee pudding, it's an old English favourite pudding of mine but all too often it's dry when you order them in pubs. Even when it's drenched in toffee sauce!
I searched the web and I decided to go for a straight forward recipe from the BBC. I halved the recipe in order to stop myself from being greedy...
Dates is something we ate often when I was still at home, so this pudding also brings back childhood memories.

Ingredients
100g dried dates, stoned
125ml black tea (not too strong, I used Lady Grey)
1/4 tsp bicarbonate of soda
42.5g unsalted butter , softened
87.5g self-raising flour
1/2 tsp mixed spice
87.5g golden caster sugar
1 eggs , beaten
The zest of half an orange (my addition, make it a whole orange if you are not halving this recipe)
30g of chopped walnuts (my addition, make it 60g if you are not halving this recipe)

Toffee sauce
100g light muscovado sugar
100g unsalted butter
142ml carton double cream

I used little loaf cases for this recipe but a brownie tin is what the recipe calls for.

1.Heat the oven to 180C/fan 160C/gas 4. Put the dates and tea in a saucepan and bring to the boil. Cook for 3-4 minutes to soften the dates. Stir in the bicarbonate of soda.

2. Beat the butter and caster sugar together with electric beaters until pale and creamy, then beat in the egg, flour and mixed spice. Fold in the date mixture and pour into a buttered ovenproof dish or brownie tin. Bake for 30-35 minutes or until the top is just firm to touch.

3. Meanwhile, make the sauce by putting the sugar, butter and cream in a pan over a low heat and simmer until the sugar has dissolved. Cook until the sauce is a lovely toffee colour.
My boyfriend's brother and his fiance bought me these cute cases with different patterns.
Finally got the chance to put them to use! Thanks guys, x!


I served them up with the homemade toffee sauce and runny cream. They were delicious and very moreish! We put the rest into the freezer to avoid late night snacking!


In Sweden it was Alla Helgons Dag on Saturday, as my sister kindly reminded me, and she also sent me a picture of her lovely "fika" bord. I am very impressed by the pumpkin carving action!

Prinsess tårta comes in all shapes and forms, that's
how much we Swedes like it!

Hope you have lovely week! Ciao! x


Wednesday 31 October 2012

Happy Halloween!

I'm not normally too involved with Halloween, it was not as big when I was little as it is now in Sweden. In Sweden we had something different which was during Easter, we called it påskkärringar and we dressed up as little witches (cute ones though, not evil). We went from house to house giving out drawings we have made in exchange for sweets. More of that and those traditions when we come to Easter.

So anyway, I wanted to come home from work and make something Halloween inspired but oooh...a day which started as glorious as the below.....

Sunny with dark rain clouds, spooky....
 
ended with unfortunate delays at Waterloo, meaning I got home later and ready for bed. I had such plans too, I wanted to make chocolate cupcakes with pumpkin puree I had bought especially. However I turned to my trusty box of cake mixture from Sweden, the one my mother kindly packed into my brother's tiny bag when he came to London a couple of weeks ago.
I never use cake mixes but it never hurts to have a box in your cake cupboard!
 
The chocolate cake mix only required water (which I exchanged for milk) and 50g of melted butter. It went into the oven for 20 minutes.
 
I was determined to make them as Halloweenie as possible so I made some cream cheese frosting which I coloured orange (not much effort but I am so tired).
 
I used Hummingbird Bakery's recipe for the cream cheese frosting (I can eat it on it's own....almost!):
 
125g cream cheese
50g butter (softened)
300g icing sugar (sifted)
 
I added 1tsp of vanilla extract and add colour to personal preference.
 
Mix the butter and icing sugar together in a standing mixer with the paddle attachment. Once incorporated, add the cold cream cheese. Mix/ beat well until it's smooth and fluffy.
Pipe as desired.


The chocolate mix tasted surprisingly nice and I will definitely pick some up on my next trip home.
 
Hope you have a spooky wookie Halloween! x


Friday 26 October 2012

Swedish goodie bag and bullar!

Last week my brother was here and we went to watch Cirque de Soleil's Michael Jackson Immortal World Tour. It was a great show, with a mixture of acrobatic tricks and dancing. It made me remember how amazing Michael Jackson was an artist. Realising my brother was about to come to London, I took the chance to order my favourite Swedish food/ingredients.

Bilar (foamy like sweets), mandelmassa (almond paste), pärlsocker, vanilla socker, marsan sås (custard), choklad pudding mix and a box of choklad tårta mix! Yum!
The week started on a foggy note and I went into Paul's to "admire" the cakes in order to comfort myself because it was so early in the morning. I was tempted to buy a Palmier but as I looked at it, it gave me an idea.....
It was a very misty morning indeed!
 
I have been meaning to make kanelbullar for a while now, partly because I have been craving some and also it's a good thing to keep in the freezer when you want a quick cake fix.
 
The recipe for Kanelbullar is pretty straight forward, the recipe has been on the back of the main Swedish flour (Kungsörnen Vetemjöl) pack for years and years. And this is where I got my recipe from;
150g butter
500ml milk
50g fresh yeast or 25g of dried ( big thanks to my local bakery for giving me the fresh yeast, x)
100ml sugar or 150ml depending on how sweet you like it
½ tsp salt
2 tsp ground cardamom (can be omitted but it's very Swedish to use)
850 g plain flour
 
1 egg (for the egg wash)
 
1. Melt the butter and milk, make sure it's no warmer than 37 degrees, so "finger warm"
2. If you are using fresh yeast, crumble it into a separate (very large bowl, you can tell by the amount of flour how big the bowl needs to be). Add a bit of the liquid to the yeast and after a couple of minutes pour it all in. I normally add the cardamom here as well.
3. Once the yeast has dissolved, add the sugar and salt and then fold the flour in (keep about 100g for the kneading)
4. I kneaded the dough by hand because it was far too much to put into the KitchenAid. It took be me 10 minutes of decent kneading to get a nice dough. 
5. Put the dough back into a bowl and let it rise for 30 minutes
6. Once the 30 minutes are over, cut the dough into half or keep it as one and roll out into rectangular shape/s.
 
For the filling, you have two options;
Cinnamon butter or Almond paste butter (then it's not really called cinnamon buns...)
 
With the cinnamon butter;
100g sugar ( I used golden caster sugar)
2 tbsp cinnamon
100g softened butter 
Mix it really well, you can even pulse it in a mixer but make sure it's spreadable.
Spread it generously on the rolled out dough and roll it up.
 
With almond paste butter;
100g the almond paste (mandelmassa)
100g softened butter
Mix it really well until spreadable
Spread it generously on the rolled out dough before rolling it up.
With both of these fillings you can adjust it to your taste, more or less butter, cinnamon, almond etc,
 
Once you have spread your filling, you would normally roll the dough up, very much like a roulade and then cut it up in whatever size buns you like.
 
After my encounter with the Palmiers I wanted to try something different and rolled two opposite sides up until they met in the middle. This created a heart shaped bun(!?) :0)
 7. You can proof the dough after you have filled them for another 40 minutes. I baked mine straight after (because I wanted to eat them sooner :0) and skipped the proofing. They turned out very nice anyway but do proof them if you have the patience.
8. Gently brush egg wash on them before going into the oven and spread some pärlsocker (very Swedish). If you aren't near any Swedish shops in order to purchase pärlsocker, you can use almond flakes which would go nicely with the almond paste version.
 
This recipe yields different amounts depending on what shapes you with. But if it's normal "bullar" (buns), it should make about 40 of them.
They looked a bit like owls to me....
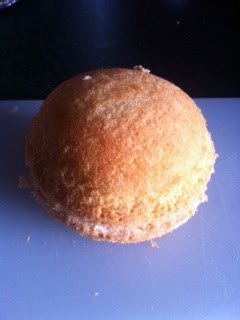
These are what bullar normally look like!
Mine were the size of a small bun so they only took 8-10 minutes. I would test one and keep it in for longer if needed. Max 15 minutes, I would say depending on size.


The heart shaped once came out beautifully and the little ones in the cases as well but I didn't capture them on camera unfortunately.
 
We brought these up to my boyfriend's parents, to enjoy over the weekend....but first I had to test try one or two whilst hot with some milk.
 
 I much prefer these to any Chelsea, sticky or iced buns. It's the perfect fika bulle!
 
Ciao! x